Monday, 27 March 2006
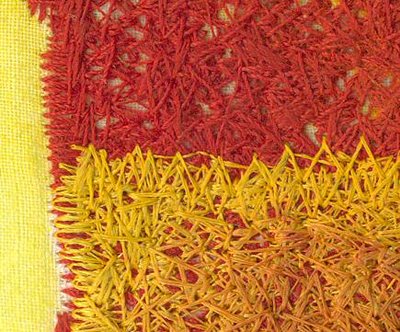
Inspired by Mark Rothko and Angie Hughes. I have recently been taking machine embroidery classes with Angie Huges in Ledbury in England. Angie taught us how to use zig zag machine embroidery and I used that technique for this zapbook page. Angie has been inspired by Mark Rothko, and through her, so have I.
I bought a new sewing machine on Friday and was able to use it for this piece. It is the first time I have had a new machine. My first one was a hand me down from my mum, very gratefully received. It was stolen from my car when I was escaping from husband no. 1. My second one was bought second hand when I was a student. It wasn't quite up to the machine embroidery, hence the new one.
I belong to the Zapbooks2 group at yahoo. Essentially, a zapbook is a book made of pages which are 6 inches by 4 inches. Each month, we sign up to participate in certain themes or to exchange unthemed pages. We send 3 to 4 pages out for each theme. This month (March) the theme I chose to join is "Abstract". The pages I made are above.
Tuesday, 21 March 2006
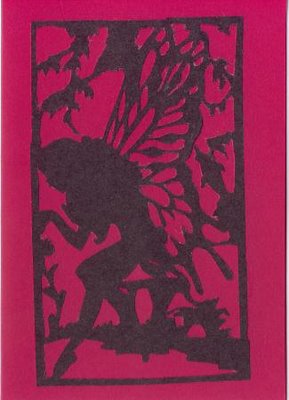
Silhouette Fairy 2
This one is done on card. The trick was to get the craft robo to cut it twice. It did so perfectly. I used my xyron afterwards to stick it onto the card and got lots of glue in the holes which had to be poked out. Very frustrating. However, next time I do it, I should have some glue for my Xyron 900 which is A4 size. I will stick the paper/card onto that and then cut it. I should just be able to peel away the silhouette afterwards.
Silhouette Fairy 1
I have signed up at Dover publications. You get some free sample images each week. The original silhouette I have used here came from there.
I opened it in PSP. Selected all the black. Contracted the selection by 1 and deleted the selection. This left me with a 1 pixel line for the printer to cut. However, the cutting part of the printer doesn't know about files saved in any of the formats that PSP saves them in. I saved the file in png format in PSP and opened the file in Wintopo which is a free ware vector graphics program. I used the one touch vectorisation program to create vector lines for the cutter. I saved that as DXF. The final step was to import the dxf into the craft robo software for cutting. This has been saved as a .gsd file. So, any time I want to recut the fairy, all I have to do is open up the .GSD file.
This one is cut on sugar paper. I was having problems with the settings for cutting on card although I have now resolved that (see the next post). I did however have to push some of the bits out. It just takes a bit of practice in terms of setting the blade length correctly.
Yipee -- I have a Craft Robo
I have just treated myself to a craft robo (known as a wish blade in the States). The craft robo is a printer that cuts. I'm using this blog to show off projects that I have made using it.
Sunday, 5 March 2006
How they were made
I warmed up the cd with a heat gun and then cut it. For the latter ones, I just broke them to see what shapes I would get. When you do it this way, they do spring all over the place, including into your face!
Some of them have had some thick acrylic paint applied. All of them have then had thick embossing crystals applied, and then heated with a heat gun. The smooth ones are very shiny. The rougher ones were melted for less time so the embossing crystals did not melt into each other.
I'm not sure what they will be like to wear. They are disconcertingly light.
Turq-ThickAcrylic
Introduction to this blog
I'm currently doing a swap of CD Jewellery. I'm sending the link so my swap partner can choose what she would like, but I thought I would share it with other people too.
Subscribe to:
Posts (Atom)